Saturday, August 11, 2012

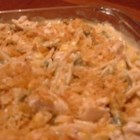
Slow Cooker Casserole

Slow Cooker Casserole Recipe


Ingredients
  • 1/2 cup butter
  • 1 (16 ounce) package frozen mixed vegetables, thawed
  • 2 (10.75 ounce) cans condensed cream of chicken soup
  • 2 (10.75 ounce) cans condensed cream of mushroom soup
  • 3 teaspoons garlic powder
  • 3 teaspoons onion powder
  • 3 (3 ounce) packages chicken flavored ramen noodles
  • 6 skinless, boneless chicken breast halves, cut into bite size pieces

Directions

  1. Cut butter or margarine into small chunks and put chunks in the bottom of the slow cooker. Add the vegetables, cream of chicken soups and cream of mushroom soups. Stir. Sprinkle with the garlic powder, onion powder and seasoning packets from the ramen noodle packages. Put chicken pieces in slow cooker. Cover and cook for 6 hours on LOW.
  2. Break each ramen noodle packet into quarters (4 'pieces'). Put noodles in slow cooker and stir to cover noodles. Cook 1 hour on HIGH. Reduce heat and let simmer until ready to serve.

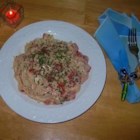
Slow Cooker Spaghetti Chicken

Slow Cooker Spaghetti Chicken Recipe


Ingredients
  • 1 (16 ounce) package spaghetti, cooked and drained
  • 1 (10.75 ounce) can condensed cream of chicken soup
  • 1 (10.75 ounce) can condensed cream of mushroom soup
  • 1 (14.5 ounce) can diced tomatoes with green chile peppers
  • 8 ounces processed cheese food
  • 4 skinless, boneless chicken breast halves - boiled and cut into bite-size pieces

Directions

  1. Bring a large pot of lightly salted water to a boil. Add spaghetti and cook for 8 to 10 minutes or until al dente; drain and set aside.
  2. Put chicken soup, mushroom soup, tomatoes with green chile peppers and cheese in slow cooker over medium heat. Stir together and cook until cheese has melted.
  3. Stir cooked chicken and spaghetti into cheese mixture and heat through. Reduce heat to medium low and cook for about 40 minutes.

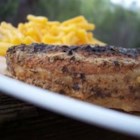
Slow Cooker Pork Chops II

Slow Cooker Pork Chops II RecipeBy: ERINVDIX
"A wonderful way to cook pork--it's extremely tasty and tender. With a mixture of spices and garlic, it's terrific. And it is extremely EASY."


Ingredients
  • 1/4 cup olive oil
  • 1 cup chicken broth
  • 2 cloves garlic, minced
  • 1 tablespoon paprika
  • 1 tablespoon garlic powder
  • 1 tablespoon poultry seasoning
  • 1 teaspoon dried oregano
  • 1 teaspoon dried basil
  • 4 thick cut boneless pork chops
  • salt and pepper to taste

Directions

  1. In a large bowl, whisk together the olive oil, chicken broth, garlic, paprika, garlic powder, poultry seasoning and basil. Pour into the slow cooker. Cut small slits in each pork chop with the tip of a knife, and season lightly with salt and pepper. Place pork chops into the slow cooker, cover, and cook on High for 4 hours. Baste periodically with the sauce.
 

Chocolate Mint Milkshake


Chocolate Mint Milkshake Recipe


By: Amy
"A cool, refreshing milkshake that will have you craving for more. All you need is milk, vanilla ice cream, chocolate syrup, and a few drops of some peppermint extract."
 
 
Ingredients
  • 4 scoops vanilla ice cream
  • 1/4 cup milk
  • 1/4 cup chocolate syrup
  • 1 drop peppermint extract

Directions

  1. In a blender, combine ice cream, milk, chocolate syrup and peppermint extract. Blend until smooth. Pour into glasses and serve.


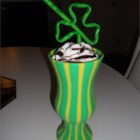
Better Butter Beer

By: PrairieJane
"We developed this version of Harry Potter's butter beer after trying several online recipes that were sickly sweet. It is basically an old fashioned ice cream soda. Mixture may foam and overflow if you are not careful."
 
Ingredients
  • 2 tablespoons butterscotch ice cream topping
  • 10 fluid ounces seltzer water
  • 2 scoops vanilla ice cream

Directions

  1. Spoon butterscotch topping into a tall glass. Whisk 1 to 2 fluid ounces seltzer water into butterscotch topping until topping is slightly thinned. Add the remaining seltzer water until glass is 3/4 full. Gently scoop ice cream into glass.

Footnotes

  • Cook's Note:
  • For a creamier textured butter beer, you can stir a small amount of softened ice cream (about 1 to 2 tablespoons) into the butterscotch topping before adding the seltzer. This also results in a foamier head on top. Sweetness may be adjusted to taste by adding more or less butterscotch topping. Sugar-free ingredients can be substituted.

Friday, August 10, 2012

Homemade Cinnamon Toast Crunch

Homemade Cinnamon Toast Crunch

By: AikoVenus from Shin's Vegan Lovin'

3/4 cup of White Whole Wheat
1/4 or 1/2 cup of Raw Sugar
1/8 tsp Turmeric
1/4 tsp Sea Salt
1 tbl Cinnamon
1/4 tsp Nutmeg
2 tbl Chia Seeds with cold water
3 squeezes Agave Nectar
1 tsp of Canola Oil
Enough (gluten-free) Oat Milk to mix

Mix all of the ingredients together with a spoon, adding the wet ingredients last, then knead about 40 times, let the dough rest for about ten minutes and then roll the dough out as thinly as you like. The more thickness it has, the less crispness and the less time it will last on the shelves. Cut your squares, slather with oat milk and sprinkle on cinnamon and sugar. Bake at 350 degrees for about 25 minutes or until fully browned and crisped then fix your bowl of cereal and enjoy.

Copycat Pillsbury Toaster Struedel


Copycat Pillsbury Toaster Struedel


  • 1 pkg Pepperidge Farm Puff Pastry (2 sheets)
  • 1 can (21oz) strawberry pie filling
  • 2 oz cream cheese
  • 2 cup powdered sugar
  • 2 Tbsp milk
Instructions
Thaw puff pastry according to package directions. Unfold and cut each sheet of pastry along seams (making 3 strips on each). Cut each strip in half, for a total of 6 rectangles on each sheet (12 in all). Poke many times with a fork and lay on parchment lined baking sheet.
Bake in a 400 degree oven for 10-12 minutes. Spoon strawberry filling into center of pastry, careful to not go over edges. Return to oven for 3-4 minutes.
Meanwhile, beat cream cheese with powdered sugar and milk for about 3 minutes until creamy. Add more milk to get to desired consistency.
Remove pastries from oven and drizzle with cream cheese frosting. Serve warm!
**you can also add some of the cream cheese filling to the pastry. Spoon a dollop on the pastry, add the strawberry pie filling, return to oven for 3-4 minutes. Then drizzle with more frosting. This is MY favorite! You may need to double the filling/frosting if you do it this way though!
urprise your kids with this classic breakfast recipe. They'll love the ooey-gooey strawberry filling of this Copycat Breakfast Pillsbury Toaster Struedel. Drizzle some sweet vanilla frosting on top to make the dish complete. This yummy treat will soon become a morning tradition in your house.

Cheesy Tomato-Chicken Skillet


Cheesy Tomato-Chicken Skillet


2
cups uncooked pasta nuggets or radiatore (7 oz)
3/4
lb chicken breast strips for stir-fry
1
can (10 3/4 oz) condensed cream of chicken soup
1 1/2
cups chopped plum (Roma) tomatoes (4 to 5 medium)
1/2
cup milk
2
tablespoons chopped fresh basil
1
cup shredded mozzarella cheese (4 oz)
  • 1 Cook pasta as directed on package. Drain; cover to keep warm.
  • 2 Meanwhile, heat 10-inch nonstick skillet over medium-high heat. Add chicken; cook 4 to 6 minutes, stirring frequently, until chicken is no longer pink in center. Reduce heat to medium; stir in soup, tomatoes, milk and basil.
  • 3 Stir in cooked pasta. Cook about 8 minutes, stirring occasionally, until bubbly and thoroughly heated. Sprinkle with cheese. Remove from heat. Cover; let stand until cheese is melted, 2 to 3 minutes.
         

Beer Cheese-Stuffed Pretzels

Beer Cheese-Stuffed Pretzels

1        can (13.8 oz) Pillsbury® refrigerated classic pizza crust
1/2     cup shredded Cheddar cheese (2 oz)
1        egg
1        bottle (12 oz) stout beer
1/4     cup baking soda
1        teaspoon coarse (kosher or sea) salt
  • 1 Heat oven to 400°F. Spray large cookie sheet with cooking spray, or line with cooking parchment paper.
  • 2 Unroll dough onto lightly floured work surface. Roll dough into 12x14-inch rectangle. Using pizza cutter, cut dough lengthwise into 4 strips.
  • 3 Along long edge of each dough strip, spread 2 tablespoons of the cheese. Stretch dough over filling; brush edges with water, and pinch to seal. Pick up ends and gently stretch each dough rope to 24 inches long.
  • 4 To make pretzel shape, form each rope into U shape. Twist ends twice. Press down dough where dough overlaps in an “X.” Pick ends up and fold over so they rest over bottom of U shape. Tuck one end under dough at bottom of U shape; other end lies over dough at bottom of U shape.
  • 5 In small bowl, beat egg and 1 tablespoon beer with whisk until blended, set aside.
  • 6 In large microwavable bowl, microwave remaining beer uncovered on High 1 minute 30 seconds or until hot. Slowly add baking soda; stir until dissolved. Dip each pretzel,1 at a time, into beer and soda mixture. Remove with large pancake turner or slotted spoon; place on rack. Let stand at room temperature 5 minutes.
  • 7 Brush pretzels with egg mixture, and sprinkle with coarse salt. Carefully transfer to cookie sheet. Bake 11 to 15 minutes or until tops of pretzels are dark golden brown.

My blog award.....YAY

I was annotated for my first blog award.  This is very exciting. Thank you to frugal midwest for this. Hope you all enjoy the post.


Rules for the award: Each person must post eleven things about themselves. Answer the eleven questions the tagger has set for you. Come up with eleven other questions for the people that you are going to tag. Choose eleven people (with less than 200 followers) and tag them in your post, no tagbacks. Follow the tagger and visit at least three of the nominees.

1.        I and my partner have 4 kids and one grandson.  My two kids are just turning into teenagers and his kids are out of high school.  So they are stretch out a lot.

2.       Favorite color is pink and green.  Green being the more favorite of the two.

3.       I live in Missouri and love it.  Been here my whole 35 years.

4.       Cooking is one of my passions.  To try new foods.

5.       I don’t like sports, but my kids play in them so I pretend to like them for them.

6.       I love to drink Kool-Aid.  Just a big ole kid stile.

7.       Love to find deals when shopping.

8.       Spend a lot of time working on my blog.

9.       Love to recycle something old in something new.

10.   I love to do DIY projects around the house.

11.   Love to do arts such as painting and designing.

  1. What made you want to or why did you start blogging                                                                                       Everyone was asking me for my recipes.  So one day I got the bright ideal to start a blog.
What is your favorite color/s?
Green and Pink.  Green being the better of the two.
What is your favorite food?
Homemade Alfredo pizza
Do you have any pets? What are they and their names?
We have two dogs.  Winston and Mia.  Two birds named Lady Gaga and Justin Bieber and two cats.  No names for them yet.
Do you have any special talents?
Arts (painting) I love to redesign old stuff into new stuff.
Describe your place of relaxation. Where is it? What does it look like?
Yoga is my place of relaxation.  I can do yoga anywhere and relax with it.
Have you been outside of the United States?
No
Can you speak other languages other than English? Which ones?
No
If you could have a super power for one day, what would it be and what would you do with it?
Superman who would not want to be him.
What was your best day of your life? Describe it if you can.
I have 3 when my kids were born and when I meet the love of my life.
Have you met any superstars? (Like movie stars, musicians, etc.) Who?
No
Here is my 11 question for my peeps.
  1.  What is your best recipes for?
  2. How many kids do you have?
  3. What is your favorite movie?
  4. Do you live in the United States?
  5. Why did you start blogging?
  6. What is your favorite blog?
  7. What was the best day of your life?
  8. What is your favorite kitchen gadget?
  9. How many pets do you have? And what is there name?
  10. Who is your role model and why?
  11. Why should I read your blog?
It is hard to find blogs with less than 200 likes or followers:
http://coupongirl2012.blogspot.com/
Thursday, August 9, 2012

Barbecued Wimpies ( Homemade Sloppy Joes )


This is a staple in are house.  My mom has been making it for years.  Everyone in the family loves it even the kids love it.

1 pound ground beef

1 cup finely chopped onion

1cup finely chopped green peppers

1 T mustard

1 T vinegar

1 tsp. salt

1 cup ketchup


Brown the ground beef and drain.  Place back into pan and mix in the rest of the ingredients.

Let simmer for 30 mins


Then sever on hamburger buns.

Homemade Crunchwrap Supreme from Taco Bell (copycat recipe)

Homemade Crunchwrap SupremeThis tasty treat recalls one of Taco Bell's best. The Homemade Crunchwrap Superem recipe is the perfect opportunity to master a Mexican-inspired copycat. The combo of nacho cheese, lettuce tomato and sour cream is irresistible.


Homemade Crunchwrap Supreme

Ingredients:
6 large flour tortillas
6 small corn tortillas (or tortilla chips)
1 pound ground beef
1 package taco seasoning
sour cream
nacho cheese (or shredded Mexican blend cheese)
shredded lettuce
diced tomatoes

Directions:
Brown ground beef in a skillet, then add taco seasoning (according to package directions). Set aside.

Bake the corn tortillas in the oven at 400 degrees for a couple of minutes, until they are golden and crunchy.

Microwave the flour tortillas, one at a time (because they cool off quickly), for about 10 seconds to warm them up; this will make wrapping easier. You could also warm them up in the oven; just wrap them in aluminum foil and heat them up for about 10 minutes at 350 degrees.

Lay out the flour tortilla. Spoon some of the seasoned beef into the center of the tortilla. Top with some nacho cheese, or shredded cheese. Place the crunchy corn tortilla on top of the cheese/beef; spread a dollop of sour cream on top of it, then toss on some diced tomatoes and shredded lettuce.

Starting with the bottom of the tortilla, fold the edge up to the center. Continue doing this in a clockwise or counter-clockwise movement until all of the tortilla is folded over, and the filling is entirely enclosed. If your filling isn't entirely enclosed and you have an open spot, simply cut out a circle from another flour tortilla and place it on the exposed area, then wrap the tortilla again.

Spray a frying pan with cooking spray. Carefully place the Crunchwrap, seam-side down, in the pan. Press with a spatula and cook on medium-low heat, for about 3 minutes, until the bottom is nice and brown. Flip it over and cook for another 3 minutes.


Wednesday, August 8, 2012

My first ever review of a product. (SodaStream)

So I just half to share the good news.  Last week I was sitting here surfing the web and decided to give a review a shot.  Now to remind you I have never done this before in my life.  I am new to the whole blogging thing.  So I did some research and decided to do a pitch to the SodaStream team.  I thought  there was noway I would get this review.  Well guess what I got a email today.  I was told  that they will be sending me a SodaStream in the mail to review.  All I got to do is tell in the review how much I like or dislike it.  And of course take lots of pictures. I'm sure we will love it.

The best part is that we have talked about buying one.  We drink so much much soda in this house.  Every time we come across the kids are saying " Dad lets get one."  " It will save you money and it would be fun to make are own soda."  We just have never bought one.  Just lots of talking about buying one.  For one thing we have not heard anything good or bad about them.  Guess now we get to see what all the fuse is about.  My kids have not heard about this yet.  They are going to go over the wall crazy using it.  Well till next time.  Have a great day.

Crescent Puff S'mores

Crescent Puff S'mores

2        cans (8 oz each) Pillsbury® refrigerated crescent dinner rolls
16      large marshmallows
2  to 3 (1.2 oz each) milk chocolate candy bars, broken into squares
1/2     cup butter or margarine, melted
1        cup graham cracker crumbs (about 14 squares)
  • 1 Heat oven to 375°F. Spray 16 regular-size muffin cups with cooking spray. Separate dough into 16 triangles.
  • 2 For each snack, place 1 marshmallow on shortest side of triangle. Top with 2 squares of chocolate candy. Starting with shortest side of triangle, fold corners of dough over marshmallow and chocolate, then roll to opposite point, completely covering marshmallow and chocolate; pinch dough to seal well.
  • 3 Dip snacks in or brush with melted butter; roll in cracker crumbs to coat. Place in muffin cups.
  • 4 Place pans on sheet of foil or cookie sheet (to catch any spills); bake 15 to 20 minutes or until golden brown. Immediately remove from muffin cups; serve warm.

Slow Cooker Cowboy Beef and BBQ Bean Sandwiches

Slow Cooker Cowboy Beef and BBQ Bean Sandwiches

2    medium onions, sliced
2-pound beef boneless arm roast, trimmed of fat
1      can (16 ounces) baked beans
1/4   cup barbecue sauce
1      teaspoon finely chopped jalapeño chili
12    onion kaiser rolls, split
1 1/2   cups prepared coleslaw
  • 1 Place onions in 3- to 4-quart slow cooker. Add beef. Top with baked beans and barbecue sauce.
  • 2 Cover and cook on low heat setting 8 to 10 hours.
  • 3 Remove beef from cooker; place on cutting board. Shred beef, using 2 forks. Return beef to cooker and mix well. Stir in chili. To serve, place 1/2 cup beef mixture in each roll and top with 2 tablespoons coleslaw.

Slow Cooker Cheeseburger Sandwiches

Slow Cooker Cheeseburger Sandwiches

1 1/2   pounds lean ground beef
1/2      teaspoon garlic pepper
1         package (8 ounces) pasteurized prepared cheese product loaf, diced (2 cups)
2         tablespoons milk
1         medium green bell pepper, chopped (1 cup)
1         small onion, chopped (1/4 cup)
2         cloves garlic, finely chopped
12       sandwich buns, split
  • 1 Cook beef and garlic pepper in 12-inch skillet over medium heat 8 to 10 minutes, stirring occasionally, until beef is brown; drain.
  • 2 Spray 3- to 4-quart slow cooker with cooking spray. Mix beef and remaining ingredients except buns in cooker.
  • 3 Cover and cook on Low heat setting 6 to 7 hours. To serve, fill buns with beef mixture.

Slow Cooker Pineapple-Pork Tacos

Slow Cooker Pineapple-Pork Tacos

1        lb boneless pork shoulder roast, trimmed
1        package (1 oz) Old El Paso® taco seasoning mix
1        can (8 oz) pineapple tidbits in juice, drained
2        teaspoons lime juice
1        package (4.6 oz) Old El Paso® taco shells
3/4     cup shredded Cheddar cheese (3 oz)
1 1/2   cups shredded lettuce
3/4      cup chopped tomato
1/3      cup sour cream
1/3      cup Old El Paso® salsa
  • 1 Spray 3- to 4-quart slow cooker with cooking spray. Place pork in slow cooker; sprinkle with taco seasoning mix. Cover; cook on Low heat setting 7 to 9 hours or until pork pulls apart easily with fork.
  • 2 Remove pork from slow cooker; shred pork. Stir into liquid in slow cooker. Stir in pineapple and lime juice.
  • 3 To serve, divide pork among taco shells (about 1/4 cup each), and top with remaining ingredients.

Strawberry-Shiraz Bars

Strawberry-Shiraz Bars

1        lb strawberries (about 3 cups), chopped
1/2     cup shiraz or other red wine
1/4     cup sugar
1/2     teaspoon vanilla
1        roll (16.5 oz) Pillsbury® refrigerated sugar cookies
  • 1 Heat oven to 375°F. Line 13x9-inch pan with cooking parchment paper.
  • 2 In 8-inch skillet, heat strawberries, wine, sugar and vanilla to boiling. Reduce heat; simmer about 5 minutes or until mixture thickens. Press berries with back of wooden spoon to smooth out texture of jam.
  • 3 With floured hands, press two-thirds of the cookie dough in bottom of pan. Spread strawberry mixture over crust. Crumble remaining dough over top.
  • 4 Bake 20 to 25 minutes or until golden brown. Refrigerate until cool and jam is set, about 30 minutes. Remove from pan, and cut into bars, 6 rows by 4 rows.

Tuesday, August 7, 2012

Jason's Everlasting Recipes Disclaimer

Jason Ebeling's Copy Cat Recipes received one or more of the products mentioned above for free for evaluation purposes, received compensation to write this post and is an affiliate of one or more of the products and banners you will see on this site. regardless, all opinion expressed are still 100% my own. I am disclosing this in accordance with the Federal Trade commissions 16 CFR, Part 255 guides concerning the Use of Endorsements and Testimonials In advertising. Jason's Copy Cat Recipes Disclosure.


DISCLAIMER: The hints and tips and home remedies given on Jason's Copy Cat Recipes website are to give you information only and not all of them have been tested by me. You are free to use any of the advice or suggestions on my site entirely at your own risk. Please note that in no way will I, my contributors, promotors or any participants be held responsible for any problems that might occur, or any damage or loss sustained due to the use of information (or by me supplying inadequate or incomplete information) that may be contained on the Jason's Copy Cat Recipeswebsite. Any health, fitness, household hints, stain removers or beauty advice is designed to help you make informed decisions and is in no way intended to be used as a substitute for professional advice or treatment. Be sure to consult with your physician before adhering to any of the information, advice or recommendations regarding your health, beauty or fitness that may be presented on this site.Understand that you are solely responsible for the use ofany information given on this site and use of anyinformation will be at your own risk.Any submissions to our site should be free of copyright and is assumed to be the intellectual property of the submitter allowing Jason's Copy Cat Recipes the rights to publish on this site or elsewhere. Disclaimer: This page is a personal web site and has been created for hobby and recreational purposes only. It does not represent any of the artists nor their management in any way. Fair Use Notice: This web site may contain copyrighted material whose use has not been specifically authorized by the copyright owner(s). This page is operated under the assumption that it's not-for-profit use on the Web constitutes 'fair use' of said copy- righted material as provided for in section 107 of the US Copyright Law.

10 Table Manners Your Kids Should Learn

Now Mind Your Manners!

As a child, how many times did you here that growing up?

Studies have shown that children learn manners better by example that by being preached to. Why is it that when your child doesn't pickup on some detail that we point out their faults? No one likes when people points out their faults, even our children.

It has also been shown that teaching your children proper manners is also another way of teaching important life lessons that they will use and remember throughout their life.

Too many people today view table manners as something that is insignificant. However, if more parents took the time to teach their children proper manners they would also be reinforcing other important life qualities such as courtesy, love for others and self-control.

Take the time to teach your children manners. If you need help in teaching your kids, checkout some helpful resources below.
 
Why are Table Manner so Important?
Table manners are so much more than about proper eating. Table manners teach some life lessons like being kind and considerate of others. In today's world, people area also judged on how they appear and how they act. Now this may not be fair but it is a matter of fact that we have to live with. Having proper table manners is one way people judge others and you don't want people to think that your children are barbarians, do you?

Believe it or not, table manners are taught as soon as your child understands what you're saying. Remember that your children are just starting to learn so they will need coaching and reminders on table manners throughout their childhood. This coaching and reminders work best with positive reinforcement.

Children will respond better by recognizing and acknowledging when your child does something right and you let them know. We also know that because your children are just learning they will make mistakes, so when your child does something wrong, do not be negative about it, instead gently tell them and better yet show them how it is best done and why.
 
Table Manner # 1 - Eat with a Fork
Teach your child to eat with a fork unless the food is meant to be eaten with fingers. Remind your child that only babies eat with fingers and you know that they are now longer a baby.

Eating with a fork is good to teach kids at a very young age because it helps them build dexterity in the hands and fingers. Yes, I know they will make a mess but it is better in the long run to teach when they are very young. It will take time so be patient.

Table Manner # 2 - Passing food

I know that you don't want to hear your child say or yell "bread" as they reach across the table. Teach your kids how to to ask for food rather than just blurting out what they want.

Proper etiquette for passing food is to pass it counterclockwise. It should also be noted that all dishes should be passed around the table.

In all honesty, we do not always follow this rule in out house but we do make sure that our kids ask for food the proper way.

So what is the proper way to ask for food at the dinner table? The proper way to ask for food to be passed is "May I have some bread, please"?
 
Table Manner # 3 - Chew with Mouth Closed
I am sure you can will agree that no one likes to look over at someone and see that person chewing their food with their mouth open. I know this is one thing that really gross me out. I hate to look around a restaurant and see someone sitting next to me chewing there food like a cow..

I would also include talking with food in the mouth in this table manner lesson.

Unfortunately, I see plenty of adults breaking both of these table manners. Again, to be honest I know that I sometimes talk with food in my mouth, but only when I need to correct my children at the dinner table. But when I do I make sure to cover my mouth so no one can see the food inside.

Teach your child to breath through their nose and chew with their mouth closed. Also, teach them to wait and speak only when their mouth is not full of food.

Table Manner # 4 - Don't Stuff your Mouth Full of Food

Until about a year ago, my wife was still getting on to our kids, especially my son, about stuffing their mouth full of food. She always explained to them that they might choke. Well if finally happened. My son was eating a piece of Mongolian beef. The beef was sliced in long, thin strips. Part of the beef got stuck going down his throat and he got choked.

This really scared him and he has not stuffed his mouth since. This was an unfortunate way for him to learn this lesson. You know most of us males are hard headed and have to learn the hard way.

Explain to your children that you do not want them to get choked. Politely explain what can happen.

Table Manner # 5 - Place a Napkin on your Lap After being Seated

Teach your child to place the napkin on their lap right after being seated. The napkin is to be used to gently wipe or dab your mouth. Teach your child to dab their mouth before drinking from a glass. No one want to see spaghetti sauce on the rim of their glass, right?

My kids used to have a habit of wiping their hands on their pants so we have taught them to keep a napkin on their lap. This way they wipe the napkin instead of their pants. Plus this keeps any stains off their pants.

It is also important that your kids learn how to properly be excused from the table to go to the restroom. The proper way is to place the napkin to the left of their plate. Once finished with their meal, they should place their napkin neatly to the right of the plate (not refolded, but not crumpled either). Typically, this process is only used when dining out at a restaurant or at a formal event. However it is good to teach this lesson at home and then reinforced when eating at a restaurant
 
Table Manner # 6 - Don't Speak Rude of the Food Being Served
Teach your kids to not make any rude or negative comments about any food being served. It will hurt someone's feelings.

Remind your child that someone took time, energy, and expense to prepare the food, and they should show your appreciation.

Also, teach your kids try a little bit of everything that is served even if they do not like the food. This is especially beneficial when your kids spend the night at a family or friends house. The family member or other parents will be very impressed with this good table manner.

Table Manner # 7 - Say Thank You

Teach your kids to always say "Thank You" when served something. Teach them to always show appreciation.

Explain to your kids why we should say thank you when being served.

Remember, someone took time, energy, to prepare and serve the food or drink, show your appreciation.

To rant real quick, how hard is it to say those two words "Thank You"? I constantly notice that adults do not say Thank You. This is so rude. My pet peeve is when I hold the door open for someone and they do not have enough courtesy to say Thank You.
 
Table Manner # 8 - How to Eat Bread
Teach your kids that when eating bread or rolls, it is proper to break off a piece of bread before buttering. Eating a whole piece of bread looks tacky.

Dipping the entire piece of bread in the side of butter looks even more tacky. Teach your kids to place a small pat of butter on the edge of their plate and not to butter their bread from the butter bowl.

Table Manner # 9 - Don't Pick..

Don't pick your teeth that is. Teach your kids that they should never pick anything out of your teeth while at the table, it's gross.

If it bothers you that bad, excuse yourself and go to the restroom to pick.

Again, teach your child that no one wants to see inside their mouth plus the mouth carries a lot of germs.
 
Table Manner # 10 - Don't Shovel...Eat Slow
Teach you kids to eat slowly, don't gobble up the food. Your kids are using a fork not a shovel. Teach them to take their time and enjoy the taste of their food.

As a general rule I tech my kids to wait about 5 seconds after swallowing before getting another forkful or spoonful. Teach your child to place their fork or spoon on the edge of their plate after each bite. This will make them slow down

Learn Basic Dinner Table Etiquette Rules


By: Jennifer Maughan
In Victorian times, even the smallest of children were able to learn and follow basic dinner table etiquette rules. However, since many aspects of meals have relaxed over the last century, so has the attention to table manners. Whether you are a parent seeking to instill good manners and table etiquette in your children or you just want to brush up on your own knowledge before attending a big work function, learn these basic etiquette guidelines to impress everyone with your manners.
The first rules of table etiquette apply right when you are sitting down to the table. Remove any electronic devices or turn them off before sitting down. Right after you sit down, put your napkin on your lap. If you are a guest, wait for everyone to be served and for the host to take the first bite before starting on your own meal. If you are presiding at your own table, you can start to eat and guests will follow.
Etiquette guidelines recommend how to use the utensils in front of you. The basic rule of thumb is to start from the outside and work in. If there are two forks on your left, use the outermost fork for the appetizer or salad, then the inner fork for the entrée. When you are finished with a utensil, set it on the plate to be cleared. Place the utensils across the middle so they won't fall off when the plate is lifted up. Put soup spoons on the soup bowl's saucer when finished.
Posture is an important part of table etiquette. Never eat with your elbows on the table and don't hunch over your plate. Instead, keep your wrists or forearms resting lightly on the table's edge and bring the food up to your mouth as you sit straight and tall. Your feet should be placed squarely on the floor, not stretched out or wrapped around the chair legs.
How you eat is really the basis of all etiquette guidelines. Load up the fork or spoon about 2/3 full so you don't put too much in your mouth. Chew with your mouth closed and don't smack or slurp. Chew and swallow before taking another bite and take it slow. If you discover something in the bite that is inedible, such as an olive pit, discreetly remove it with your fork and put it back on your plate

Green Chile Mac and Cheese Cost per serving: $1.28

Green chile mac and cheeseDon't scramble around the day of the party—you can partially make this dish (through step three) up to a day in advance. Simply cover and refrigerate; the morning of your get-together, sprinkle on the topping and bake.


Salt and pepper
  • 1 pound elbow macaroni $
    Click to see savings
  • 6 tablespoons unsalted butter
  • 1 small onion, chopped $
    Click to see savings
  • 2 jalapeños, seeded, finely chopped
  • 1/2 cup all-purpose flour
  • 4 cups low-fat milk, warmed $
    Click to see savings
  • 2 4-oz. cans chopped green chiles, drained
  • 8 ounces sharp Cheddar, shredded (about 2 cups) $
    Click to see savings
  • 8 ounces pepper Jack, shredded (about 2 cups)
  • 1 1/2 cups crushed corn chips $
    Click to see savings
  • Preparation

    1. 1. Preheat oven to 375ºF; line a large baking sheet with foil. Bring a large pot of salted water to a boil. Cook macaroni until al dente, about 8 minutes, or as label directs. Drain; rinse under cold water.
    2. 2. Melt butter in a large skillet over medium-low heat. Add onion and jalapeños and sauté until soft, about 10 minutes. Sprinkle flour on onion mixture and cook, stirring constantly, 3 minutes. Slowly whisk in milk. Raise heat to medium and slowly bring to a simmer, stirring constantly. Cook for 2 minutes. Stir in chiles. Set aside 1/2 cup of Cheddar. Add remaining Cheddar and all pepper Jack to skillet and cook, stirring, until all cheese has melted. Season with salt and pepper.
    3. 3. Add pasta to skillet; stir. Mist a 13-by-9-inch baking dish with cooking spray and pour in pasta mixture.
    4. 4. In a bowl, combine corn chips with reserved 1/2 cup Cheddar; sprinkle over pasta. Place dish on lined baking sheet; bake until pasta mixture is bubbling and top is golden, 40 to 45 minutes. Let rest for 5 minutes; serve.