Saturday, July 14, 2012

Claire Robinson's Grown-Up Farmhouse Grilled Cheese

How does 5-Ingredient Fix host Claire Robinson put a fresh twist on the classic grilled cheese sandwich? She uses tangy white farmhouse cheddar, salty pancetta, and sweet heirloom tomatoes. Her childhood favorite, all grown up!

Ingredients
  • 8 slice(s) (thin) pancetta
  • 8 slice(s) brioche, about 1/2-inch thick each
  • 4 ounce(s) (recommended: farmhouse) sharp white cheddar, thinly sliced
  • 1 large heirloom tomato, cut into 4 slices
  • Kosher salt
  • Freshly cracked black pepper
  • 3 tablespoon(s) butter, room temperature

Directions
  1. Preheat the oven to 425° F. Set a rack on a rimmed baking sheet.
  2. Lay the pancetta slices on the rack on the baking sheet and bake until crisp, 15 to 18 minutes.
  3. Meanwhile, set your toaster to a low setting and toast the brioche slices (they should be slightly dry but not brown).
  4. Lay 4 slices lightly toasted brioche on a work surface and cover the slices with half the cheese, followed by a slice of tomato. Season each sandwich with a pinch of salt and a healthy grind of black pepper. Top each with 2 pancetta rounds and the remaining cheese. Lay the remaining brioche slices on top and press down lightly. Butter the top of each sandwich with 1/2 tablespoon butter.
  5. Heat a large griddle pan over medium heat.
  6. Melt the remaining tablespoon butter on the griddle pan and add the sandwiches, buttered side up. Cook until the bread is golden brown and the cheese is beginning to melt. Flip the sandwiches, press lightly, and continue cooking until golden and toasty. Transfer to a cutting board and slice the sandwiches with a serrated knife, on the diagonal. Arrange on a serving platter and serve immediately.

Puffy Apple Pancake

puffy apple pancakes
Ingredients
  • 1 big green apple, peeled, cored, and diced (I recommend a Granny Smith apple.)
  • 1/4 teaspoon(s) cinnamon
  • 2 tablespoon(s) sugar
  • 1/3 cup(s) flour
  • pinch(s) salt
  • 1 1/2 teaspoon(s) baking powder
  • 1 egg
  • 1/2 teaspoon(s) vanilla
  • 1/4 cup(s) milk
  • 2 teaspoon(s) butter
  • Powdered sugar

Directions
  1. Whisk together the cinnamon, sugar, flour, salt, baking powder, egg, vanilla, and milk until combined, but don't worry about lumps. (This is one of those recipes with baking powder, so you need to measure carefully.)
  2. Melt the butter in the skillet on medium heat. Add the apples, and then pour the batter over them. Cover the skillet with the lid and cook for 10 to 12 minutes.
  3. Turn off the stove, take the skillet off the burner, and remove the lid.
  4. Use the spatula to loosen the cake from the sides of the skillet. Next, put the serving plate upside-down over the skillet, and flip the pancake onto the plate by turning the whole thing over. (Use potholders to protect your hands).
  5. Sift powdered sugar over the top (which used to be the bottom). Savor your masterpiece

Dulce de Leche Cupcakes

Dulce de Leche Cupcakes

Adapted from justJENN Recipes
Makes 12 cupcakes

1 1/2 cups all-purpose flour
1/2 tsp baking powder
1/4 tsp salt
3/4 cup brown sugar
1/2 cup granulated sugar
1/2 cup (1 stick) butter, softened
2 large eggs
1/2 tsp vanilla extract
3/4 cup milk

1. Preheat oven to 325 degrees. Grease a standard 12-cup muffin pan or insert paper liners.

2. In a medium bowl, whisk the flour, baking powder and salt. Set aside.

3. In the bowl of an electric mixer, cream together the sugars and butter. Add the eggs and vanilla until combined. Alternate the flour mixture with the milk until you get a smooth batter. Spoon into the muffin pan wells equally, about 2/3 full.

4. Bake for 18-20 minutes, or until a testter comes out clean. Cool completely before frosting.

Dulce de Leche Buttercream
Adapted from Joy the Baker

1 1/2 cups unsalted butter, softened
3 Tablespoons heavy cream
1 teaspoon vanilla
4 cups powdered sugar
pinch of salt
3/4 cup dulce de leche

Cream together softened butter and powdered sugar on low using an electric mixer. Add cream, salt, and vanilla and beat on medium speed until smooth and no lumps appear. Scrape down the sides of the bowl. Add the prepared dulce de leche and beat to incorporate. Frost cooled cupcakes using a knife or a pastry bag and tip.

Cookies and Cream Cupcakes


Cookies and Cream Cupcakes (makes 12 glorious cupcakes)
Print this recipe!
For the Cupcakes:
  • 1 cup soy milk (I like So Good fat-free vanilla)
  • 1 teaspoon apple cider vinegar (I substituted white distilled)
  • 3/4 cup granulated sugar
  • 1/3 cup canola oil
  • 1 tsp vanilla extract
  • 1/2 teaspoon almond extract, chocolate extract, or more vanilla extract (I opted for more vanilla)
  • 1 cup all-purpose flour
  • 1/3 cup cocoa powder, Dutch-processed or regular
  • 3/4 teaspoon baking soda
  • 1/2 teaspoon baking powder
  • 1/4 teaspoon salt
  • 1 cup (about 10 cookies; chop first then measure) of coarsely chopped vegan chocolate cream-filled sandwich cookies (such as Newman-O’s) (if keeping the recipe vegan isn’t important to you, you can just use Oreos (which is what I did))
For the Vegan Cookies and Cream Buttercream Frosting:
  • 1/2 cup nonhydrogenated shortening
  • 1/2 cup nonhydrogenated margarine (I used Earth Balance)
  • 3-1/2 cups confectioners’ sugar, sifted
  • 1-1/2 teaspoons vanilla extract
  • 1/4 cup plain soy milk or soy creamer (again, I just used So Good fat-free vanilla)
  • 1/2 cup finely mashed sandwich cookie crumbs.
Directions
  1. Preheat oven to 350°F and line muffin pan with paper or foil liners
  2. Whisk together soy milk and vinegar in a large bowl, and set aside for a few minutes to curdle. Add the sugar, oil, and vanilla extract, and other extract, if using, to the soy milk mixture and beat till foamy. In a separate bowl, sift together the flour, cocoa powder, baking soda, baking powder, and salt. Add in two batches to wet ingredients and beat till no large lumps remain (a few tiny lumps are okay).
  3. Gently mix 1 cup of coarsely chopped sandwich cookies into the cupcake batter.
  4. Pour into liners, filling ¾ of the way. Bake 18-20 minutes, until a toothpick inserted into the center comes out clean. Transfer to cooling rack and let cool completely.
  5. Beat the shortening and margarine together until well combined and fluffy. Add the sugar and beat for about 3 more minutes. Add the vanilla and soy milk, beat for another 5-7 minutes until fluffy and smooth. Stir 1/2 cup finely mashed sandwich cookies crumbs into the frosting.
  6. To assemble, frost cupcakes generously and top each cupcake with half of a sandwich cookie.
Cookies and Cream Heaven
Sublime
Check out that nice little hunk of cookie sticking out there! Oh yeah!

Chai Latte Cupcakes


  • 1 cup soy milk or rice milk
  • 4 black tea bags (or 2 tablespoons loose black tea)
  • 1/4 cup canola oil
  • 1/2 cup vanilla or plain soy yogurt
  • 3/4 cup granulated sugar
  • 1 teaspoon vanilla extract
  • 1-1/3 cups all-purpose flour
  • 1/4 teaspoon baking soda
  • 1/2 teaspoon baking powder
  • 1/2 teaspoon salt
  • 2 teaspoons ground cinnamon
  • 1 teaspoon ground cardamom
  • 1/2 teaspoon ground ginger
  • 1/4 teaspoon ground cloves
  • Pinch to 1/8 teaspoon ground white or black pepper
  • For the Fluffy Vegan Buttercream Frosting:
    • 1/2 cup nonhydrogenated shortening
    • 1/2 cup nonhydrogenated margarine
    • 3-1/2 cups confectioners’ sugar, sifted
    • 1-1/2 teaspoons vanilla extract
    • 1/4 cup plain soy milk or soy creamer
    For the Spiced Chocolate Dust:
    • 1 tablespoon cocoa powder
    • 1/2 teaspoon ground cinnamon
    • 1/8 teaspoon ground nutmeg
    • 12 cinnamon sticks (optional)
    Directions
    1. Preheat oven to 350°F and line muffin pan with paper or foil liners
    2. Heat soy milk in a small saucepan over medium till almost boiling. Add tea bags, cover, and remove from heat. Let sit for 10 minutes. When ready, dunk teabags a few times in soy milk and squeeze gently to extract any soy milk before removing. Discard tea bags. Measure the soy milk and tea mixture and add more soy milk if it is less than 1 cup.
    3. In a large bowl, whisk together oil, yogurt, sugar, vanilla, and tea mixture until all yogurt lumps disappear. Sift flour, baking soda, baking powder, salt, cinnamon, cardamom, ginger, cloves, and pepper. Mix until large lumps disappear; some small lumps are okay.
    4. Pour into liners, filling ¾ of the way. Bake 20-22 minutes, until a toothpick inserted into the center comes out clean. Transfer to cooling rack and let cool completely.
    5. Beat the shortening and margarine together until well combined and fluffy. Add the sugar and beat for about 3 more minutes. Add the vanilla and soy milk, beat for another 5-7 minutes until fluffy and smooth.
    6. In a small bowl, mix together cocoa, cinnamon, and nutmeg. Hello spiced chocolate dust.
    7. To assemble, frost cupcakes generously and lightly sift the spiced chocolate dust over the buttercream frosting. It’s cute to stick a cinnamon stick into the frosting if you are feeling fancy-pants.
    The compact, convenient and charming Chai Cupcake for those on the go!
    Divine

    Sesame-Crouton Asian Chicken Salad

    Sesame-Crouton Asian Chicken Salad


    1/2       cup McCormick® Sesame Seed                                        
    1/4       cup LAND O LAKES® Butter, softened
    1/2       cup soy sauce, room temperature
    2          teaspoons freshly grated gingerroot
    1          can (11 oz) Pillsbury® refrigerated original breadsticks (12 breadsticks)
    2 1/2    cups cubed cooked chicken
    2 1/2    cups broccoli slaw or shredded broccoli
    1          cup chopped cucumber
    3/4       cup julienne carrots (from 10-oz bag)
    1/2       cup chopped fresh cilantro
    1/4       cup finely chopped red onion
    1/4       cup Fisher® Cashews, Halves and Pieces, coarsely chopped
    1/2       cup Crisco® Pure Olive Oil
    1/3       cup cider vinegar                                         
    1/2        to 1 teaspoon sesame oil
    3           tablespoons sugar                                           
    • 1 In 10-inch skillet, cook sesame seed over medium-high heat 3 to 5 minutes, stirring constantly, until lightly toasted. Remove from skillet to plate to cool.
    • 2 Heat oven to 375°F. In small bowl, beat butter, 1 tablespoon of the soy sauce, 1 teaspoon of the gingerroot and 2 tablespoons of the sesame seed with electric mixer on low speed until blended. Carefully unroll dough into 2 rectangles. On each of 2 ungreased cookie sheets with sides, place 1 rectangle; press into 8x6-inch rectangle. Spread with butter mixture. Using pizza cutter, cut each rectangle lengthwise into 6 breadsticks, then cut each breadstick crosswise into 8 pieces.
    • 3 Bake 8 to 12 minutes, rotating cookie sheets halfway through baking, until crisp. Remove from cookie sheet to cooling rack; cool.
    • 4 Meanwhile, in large bowl, toss chicken, broccoli slaw, cucumber, carrots, cilantro, onion and cashews. In container with tight-fitting lid, shake olive oil, vinegar, sesame oil, sugar and remaining soy sauce, gingerroot and sesame seed until well blended. Just before serving, pour dressing over chicken mixture; toss to coat. Add croutons; stir lightly.
    Thirty-One Consultant Brenda Grabowski has what you need! She is even giving an Organizing Utility Tote to one LUCKY reader. Enter to win at the bottom of this review!!

    Thirty-One has got your organizational needs covered! You can be organized and travel in style! They carry Totes, purses, luggage, baskets, and more! Plus, you get to choose the pattern that best suits you!! I get excited just thinking about it!

    I have met an absolutely wonderful lady, Brenda Grabowski who is a Thirty-One consultant that knows it and has it all! She is the "Go to person" to contact, if you are in need of support, advice, or if you just need to make a purchase!!

    What makes it so great to shop with Brenda, is her availability!


    You can join her Facebook Group: Brenda Grabowski & 31 Gifts 
    Browse her Thirty-One Website
    Shoot her an Email  24/7 
    Follow her Tweets and Pinterest

    She ALWAYS responds back very quickly and is so ready to help!

    I am honored to have reviewed MANY items of hers and to let you my opinion of them all!!

    Our family goes boating and swimming constantly and we need something that hols everything!! Brenda recommended that we start with an Organizing Utility Tote because it is a nice size plus it has many (7 to be precise) pockets to fill up!

    Here is a look at what we packed!
    ~ 4 towels
    ~ paper towel roll
    ~ 3 pairs of sunglasses
    ~ Boat Key
    ~ Ipod
    ~ wipes
    ~ snacks
    ~ water cup
    ~ sun block
    ~ Zipper Pouch
                 and NOOK

    Look how it ALL fits perfectly and neatly in the Organizing Tote!! Plus it is easy to carry and looks so stylish and fun!


    This is the back side of the tote! I even have room for more stuff, so I stashed in a trash bag!


    Here is a picture of the Zipper Pouch! You can see how perfect the size is next to the SunBlock!


    When I am not boating or swimming or on the soccer field, I am teaching 5th grade Math!

    I HAVE to be organized and I completely stress out if I am not! So, I went out to Staples and bought a plastic file folder holder, file holders (hanging and non-hanging), sharpies, and tons of more school supplies!

    Look how GREAT it all looks in my bag!! I can carry everything I need and it is all in one place when I go to grade, plan, or whatever else I need to do! I am not running all over the place looking for something to write with or on, it is all in my bag!!

    PERFECT!!


    Just imagine what else you could organize in a bag like this: Bills, Scrapbooking, 2nd business, toys, your car, laundry, graden tools, and the list just goes on and on!!!


    Need to run out to a meeting?
    This fold and Go is perfect!! It comes with a notepad and pockets to stash a pen and whatever else you may need!


    On our long boat trips we grab our personalized "Boat Tote" in addition to our Organizing Utility Tote! Personalization, something else that Brenda can help you do!


    For the entire month of July, if you spend $31 or more, you get to pick any of the above for just $5.00!!! That is a GREAT deal!

    Also, Personalization during the entire month is just $5.00 (Certainly something to take advantage of)!!


    Want to earn Thirty-One stuff for FREE????? Host a party~let Brenda tell you all about the hostess benefits how much fun you'll have hosting a party!

    Ask Brenda how you can change your life forever for just $99!!!

    How would you like to WIN a FREE Thirty-One Organizing Utility Tote??? Brenda is giving one away and you could be the lucky winner!! You will get to pick the pattern that fits your style! Just register below in the rafflecopter!!


    Want to hear the Thirty-One story? Watch the video


    Baked Ravioli

    Baking pasta with cheese on top creates a chewy and crispy topping kids will love. You can assemble the dish ahead and refrigerate it, then bake it right before dinner. Try this recipe with 1 pound of spaghetti (cook a few minutes less than the package instructions direct). Don't worry if it seems like there's too much sauce; it will be absorbed as the pasta bakes.


    Ingredients
    • 2 tablespoon(s) olive oil
    • 1 medium onion, chopped
    • 3 clove(s) garlic, minced
    • Coarse salt and ground pepper
    • 1 1/2 teaspoon(s) dried thyme, or oregano
    • 1 can(s) whole tomatoes, 28 ounces
    • 1 can(s) (28 ounces) crushed tomatoes
    • 2 pound(s) store-bought ravioli
    • 1 1/2 cup(s) shredded mozzarella cheese
    • 1/2 cup(s) grated Parmesan cheese

    Directions
    1. Preheat oven to 425 degrees. Heat oil in a large saucepan over medium heat. Add onion and garlic, and season with salt and pepper; cook, stirring occasionally, until softened, about 5 minutes. Add thyme and tomatoes. Bring to a boil, reduce heat, and simmer, breaking up tomatoes with spoon, until sauce is thickened and reduced to about 5 1/2 cups, 20 to 25 minutes.
    2. Meanwhile, cook ravioli in a large pot of boiling salted water just until they float to the top (pasta will continue to cook in oven). Drain pasta; return to pot.
    3. Toss sauce with pasta. Pour pasta into a large gratin dish or 9-by-13-inch baking dish, and sprinkle with cheeses. Bake until golden, 20 to 25 minutes. Cool slightly before serving.

    Baked Rigatoni with Spinach, Ricotta, and Fontina

    A quick take on spinach and ricotta cannelloni, this baked pasta is fast because there's nothing to stuff. The filling is simply tossed with cooked rigatoni that's then topped with fontina and baked to a golden brown.
    baked-rigatoni-spinach-ricotta-fontina-recipe
    Ingredients
    • 1 pound(s) rigatoni
    • 3 tablespoon(s) olive oil
    • 1 package(s) (10-ounce) frozen spinach, thawed
    • 2 cup(s) (about 1 pound) ricotta
    • 5 tablespoon(s) grated Parmesan
    • 1/2 teaspoon(s) grated nutmeg
    • 3/4 teaspoon(s) salt
    • 1/4 teaspoon(s) fresh-ground black pepper
    • 6 ounce(s) fontina, grated (about 1 1/2 cups)

    Directions
    1. Heat the oven to 450°F. Oil a 9-by-13-inch baking dish.
    2. In a large pot of boiling, salted water, cook the rigatoni until almost done, about 12 minutes. Drain. Put the pasta in the prepared baking dish and toss with 1 tablespoon of the oil.
    3. Meanwhile, squeeze as much of the water as possible from the spinach. Put the spinach in a food processor and puree with the ricotta, 3 tablespoons of the Parmesan, the nutmeg, salt, and pepper. Stir in half the fontina.
    4. Stir the spinach mixture into the pasta. Top with the remaining fontina and Parmesan. Drizzle the remaining 2 tablespoons oil over the top. Bake the pasta until the top is golden brown, 15 to 20 minutes.
    5. Variation: You can substitute another chunky pasta, such as penne rigate, penne, ziti or fusilli. Boil all of these one or two minutes less.
    6. Wine Recommendation: A delicately flavored white such as Orvieto will complement the mild ricotta nicely. And, because Orvieto is not oaky, the wine has no bitter tannin to clash with the slightly bitter spinach and nutmeg.

    Malted Milk Cupcakes

    Malted Milk Cupcakes 5304 r1


    Malted Milk Cupcakes
    Via Julie Hasson: 125 Best Cupcake recipes adapted by Isabelle
    Print this recipe here!

    125 ml (1/2 cup) melted butter at room temperature
    2 eggs
    125 ml (1/2 cup) milk
    10 ml (2 tsp.) vanilla
    180 g (1 1/2 cups) flour
    150 g (3/4 cup) sugar
    200 g (1 cup) chocolate-covered malted milk balls, halved
    60 g (1/4 cup) malted milk powder
    10 ml (2 tbsp.) baking powder
    1 ml (1/4 tsp.) salt

    Preheat oven to 350°F (180°C).
    Line a 12-cup muffin pan with paper liners.
    In a large bowl, combine flour, sugar, baking powder, salt, malted milk powder and chocolate-covered malted milk.
    In another bowl, combine butter, eggs, milk and vanilla.
    Add liquid ingredients to dry ingredients and mix gently.
    Pour the batter among muffin cups.
    Bake approximately 20-25 minutes or until a toothpick inserted in the center of a cupcake comes out clean.
    Cool on rack 10 minutes before removing from pan.


    Fluffy Malted Milk Frosting
    Via Martha Stewart's book: Cupcakes - adapted by Isabelle

    160 g (3/4 cup) butter, room tempearture
    225 g (2 cups) confectionners’ sugar
    30 ml (2 tbsp) malted milk powder
    2,5 ml (1/2 tsp.) pure vanilla extract

    With a electric mix, beat butter at medium speed about 2 minutes.
    Reduce speed and add the confectionners’ sugar 60 g (1/2 cup) at a time.
    Beating well after each addition.
    Add malted milk powder and vanilla, beat well.
    If not using immediately, frosting can be refrigerated up to 10 days in a airtight container.
    Before using, bring to room temperature.

    Chocolate Whiskey and Beer Cupcakes

    I've been eyeing these cupcakes for quite some time. They're from Smitten Kitchen and they've been on my to-bake list since they popped up over a year ago. Since then, many other bloggers have made them and raved. I finally took the leap and made these for our Superbowl XLIV party.

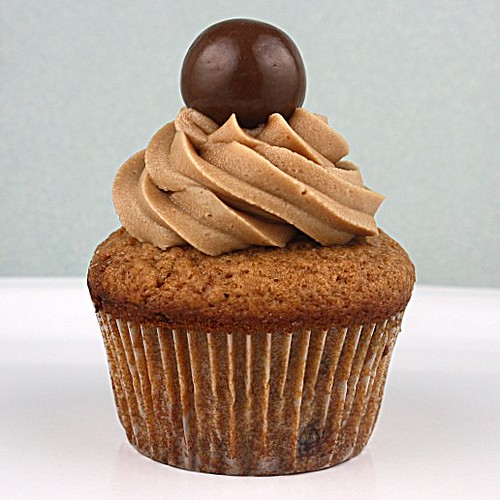
    Everyone enjoyed the cupcakes and I think my favorite part was the ganache filling. It was just perfect. Of course, all of the components of this cupcake were really good. The Guinness in the cupcakes keep them very moist. Even a couple days later, this cupcake was very tasty and moist. Each component has alcohol in it, so these were the perfect cupcakes for a Superbowl party. They'd also be perfect to celebrate St Patty's Day!

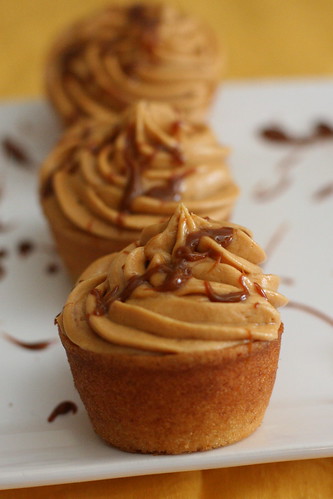
    I got 21 cupcakes out of the batter, but since they didn't have nice pretty domes, if I make these again, I'll portion the batter into 22-24 cupcakes. I don't like when cupcakes don't rise up and dome and just spread out and get a flat top that hangs over the edges. They still taste amazing but just don't look as pretty, and they're hard to get out of the cupcake pan.

    One Year Ago: Mashed Sweet Potatoes
    Two Years Ago: S'Mores Cupcakes

    Chocolate Whiskey and Beer Cupcakes - from Smitten Kitchen - makes ~20
    Printable Recipe
    Guinness Chocolate Cupcakes
    1 c Guinness
    1 c unsalted butter
    3/4 c unsweetened cocoa powder
    2 c flour
    2 c sugar
    1 1/2 tsp baking soda
    3/4 tsp salt
    2 eggs
    2/3 c sour cream

    Ganache Filling
    8 oz bittersweet chocolate
    2/3 c heavy cream
    2 Tbsp butter, room temperature
    1 to 2 tsp Irish whiskey (optional)

    Baileys Frosting
    3 to 4 c confections sugar
    1/2 c unsalted butter, at room temperatue
    3 to 4 Tbsp Baileys (or milk, or heavy cream, or a combination thereof)

    Make the cupcakes
    Preheat oven to 350°F. Line 24 cupcake cups with liners. Bring 1 cup stout and 1 cup butter to simmer in heavy large saucepan over medium heat. Add cocoa powder and whisk until mixture is smooth. Cool slightly.

    Whisk flour, sugar, baking soda, and 3/4 teaspoon salt in large bowl to blend. Using electric mixer, beat eggs and sour cream in another large bowl to blend. Add stout-chocolate mixture to egg mixture and beat just to combine. Add flour mixture and beat briefly on slow speed. Using rubber spatula, fold batter until completely combined. Divide batter among cupcake liners, filling them 2/3 to 3/4 of the way. Bake cake until tester inserted into center comes out clean, rotating them once front to back if your oven bakes unevenly, about 17 minutes. Cool cupcakes on a rack completely.

    Make the filling
    Chop the chocolate and transfer it to a heatproof bowl. Heat the cream until simmering and pour it over the chocolate. Let it sit for one minute and then stir until smooth. Add the butter and whiskey and stir until combined.

    Fill the cupcakes
    Let the ganache cool until thick but still soft enough to be piped. Meanwhile, using your 1-inch round cookie cutter or an apple corer, cut the centers out of the cooled cupcakes. You want to go most of the way down the cupcake but not cut through the bottom — aim for 2/3 of the way. A slim spoon or grapefruit knife will help you get the center out. Those are your “tasters”. Put the ganache into a piping bag with a wide tip and fill the holes in each cupcake to the top.

    Make the frosting
    Whip the butter in the bowl of an electric mixer, or with a hand mixer, for several minutes. You want to get it very light and fluffy. Slowly add the powdered sugar, a few tablespoons at a time.

    When the frosting looks thick enough to spread, drizzle in the Baileys (or milk) and whip it until combined. If this has made the frosting too thin (it shouldn’t, but just in case) beat in another spoonful or two of powdered sugar.

    Ice and decorate the cupcakes.

    You can bake the cupcakes a week or two in advance and store them, well wrapped, in the freezer. You can also fill them before you freeze them. They also keep filled — or filled and frosted — in the fridge for a day.

    Thanks to Beantown Baker

    Root Beer Float Cupcakes

    Post image for Root Beer Float Cupcakes
    by Jess on April 11, 2010 ·

    Ok I’m a genius. I love root beer floats, so a root beer flavored cupcake was a no brainer. Of course I discovered that I wasn’t the only genius to have this idea.
    After doing a search, I did find a few different recipes for root beer float cupcakes. Nothing really like the picture I had formed in my head. To find the cupcake recipe I wanted something that was moist. The Joy of Baking’s Vanilla Cupcake recipe fit the bill. Next I wanted to do a cream filling. Our Best Bites has the perfect one! Then a glaze and Wilton’s Buttercream frosting for the top.
    Enjoy!
    My ingredients

    Sugar and Butter creamed until fluffy.

    Add the eggs

    Add the concentrate

    Dry ingredients whisked together

    Add the milk and dry ingredients in intervals

    Filled cupcake pans

    Baked cupcakes

    Fillings milk mixture

    Creamed butter and sugar

    Finished Filling

    I cut wells to add the filling

    Filled with glaze

    Finished frosting


    Root Beer Cupcakes


    • 1/2 cup (113 grams) unsalted butter temperature
    • 2/3 cup (130 grams) granulated white sugar
    • 3 large eggs
    • 2 1/2 teaspoon root beer concentrate
    • 1 1/2 cups (195 grams) all purpose flour
    • 1 1/2 teaspoons baking powder
    • 1/4 teaspoon salt
    • 1/4 cup (60 ml) milk
    Preheat oven to 350 degrees F (177 degrees C) and line 12 muffin cups with paper liners.
    In the bowl of your electric mixer, or with a hand mixer, beat the butter and sugar until light and fluffy. Add the eggs, one at a time, beating well after each addition. Beat in the root beer concentrate.
    In a separate bowl whisk together the flour, baking powder, and salt.
    With the mixer on low speed, alternately add the flour mixture and milk, in three additions, beginning and ending with the flour. Scrape down the sides of the bowl as needed.
    Evenly fill the muffin cups with the batter and bake for about 18-20 minutes or until nicely browned and a toothpick inserted into a cupcake comes out clean. Remove from oven and place on a wire rack to cool. Once the cupcakes have completely cooled, frost with icing. If you want flat topped cupcakes then slice off the dome of each cupcake, with a sharp knife, before frosting. If you want to pipe the frosting, I like to use a large Wilton 1M star decorating tip.
    Cream Filling
    • 3 T Flour
    • 1/2 C milk
    • 1/2 C real butter
    • 1/2 C sugar (that’s granulated sugar, not powdered sugar)
    • 1 t vanilla extract, or other flavor if you wish.
    Whisk together the flour and the milk. Heat in a small sauce pan on medium heat.
    Whisk continuously until it starts to thicken. Let it cook, while stirring, until you can start to see the bottom of the pan.
    It’s okay if you have lumps, because we’re gonna strain those out right now. Place the mixture in a mesh strainer and stir with a rubber spatula to push it through.
    You should end up with a nice, smooth mixture. It’s almost like pudding before it’s set.
    Put this mixture in the fridge and let it cool completely, it’s fine if it stays in there long enough to get chilly, you just don’t want it warm at all. When it is chilled, you can move on to the following step.
    It an electric stand mixer, beat the butter and the sugar for a minute or two until well combined and fluffy. You’ll want to use the whisk attachment on a stand mixer, not the flat paddle. Then while beating, add in the thickened milk mixture and the vanilla. Beat to combine and then scrape down the sides.
    Beat on med-high for 7-8 minutes.
    Root Beer Glaze
    • 2 T confectioners’ sugar
    • 1/8 t root beer concentrate
    • Milk to your likeness
    Just mix all together and drizzle on your cupcakes
    Buttercream Frosting

    Ingredients:
    • 1/2 cup solid vegetable shortening
    • 1/2 cup (1 stick) butter or margarine softened
    • 1 teaspoon clear vanilla extract
    • 4 cups sifted confectioners’ sugar (approximately 1 lb.)
    • 2 tablespoons milk
    Makes: About 3 cups of icing.
    Instructions
    (Medium Consistency)
    In large bowl, cream shortening and butter with electric mixer. Add vanilla. Gradually add sugar, one cup at a time, beating well on medium speed. Scrape sides and bottom of bowl often. When all sugar has been mixed in, icing will appear dry. Add milk and beat at medium speed until light and fluffy. Keep bowl covered with a damp cloth until ready to use.
    For best results, keep icing bowl in refrigerator when not in use. Refrigerated in an airtight container, this icing can be stored 2 weeks. Rewhip before using.
    For thin (spreading) consistency icing, add 2 tablespoons light corn syrup, water or milk.
    For Pure White Icing (stiff consistency), omit butter; substitute an additional 1/2 cup shortening for butter and add 1/2 teaspoon No-Color Butter Flavor. Add up to 4 tablespoons light corn syrup, water or milk to thin for icing cakes.